
Setting Up DVWA for Kali Linux

Intro
Here we’re going to learn how to quickly and safely install Damn Vulnerable Web Application (DVWA) within Kali Linux.
DVWA is an excellent testing and awareness application made by DigiNinja for security practitioners.
Step 1 – Kali Linux
This guide assumes that you’re familiar with Virtual Machines and Installing Kali.
For now, just boot into Kali and open up a terminal.
Step 2 – DVWA Github
The first step is to go to the official DVWA Github. Whenever you’re about to use a Github repo, it’s a good idea to check the stars of the repo. Although it’s not a 100% fool proof method, it’s a good indication that the community approves of and is in favour of the repo.
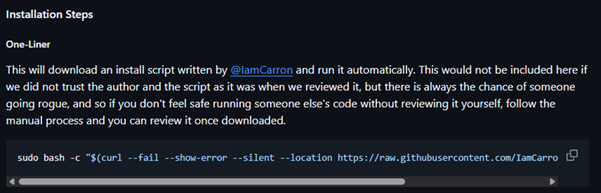
Go to https://github.com/digininja/DVWA and scroll down to the One-Liner chapter
When you’re at the One-Liner chapter, take a copy of the one-liner and return to your Kali prompt.
Step 3a – Installing DVWA
Within your Kali Terminal, paste the one-liner from Github and press enter, it will run through the installation steps for you. It really is as simple as that. We have been really blessed by the work IamCarron has done to make the installation of DVWA for us.
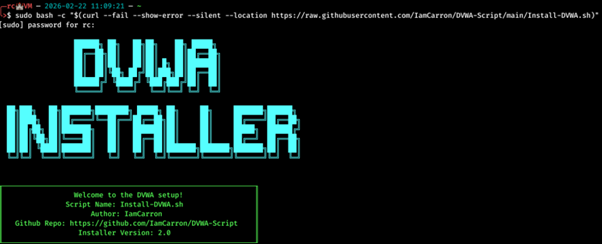
Step 3b – Installing DVWA
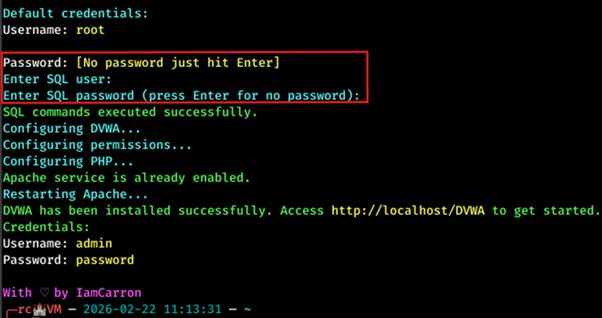
You will get prompted to set some credentials for the SQL user. We press enter twice here to set no user or password.
Step 4a – DVWA Setup
The one-liner will only take a few minutes to install and setup. Once it has been setup, we can start DVWA.
Go to localhost/DVWA/login.php and you’ll find a login page.
The credentials to log into DVWA are admin:password.
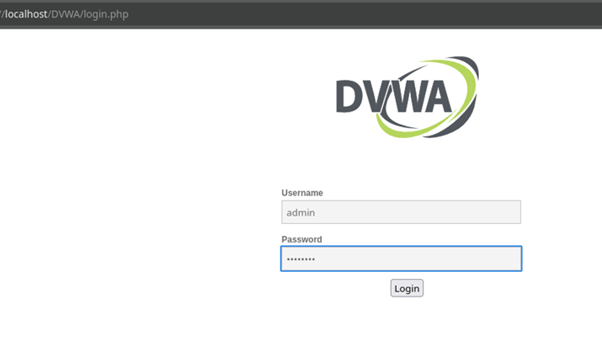
Step 4b – DVWA Setup
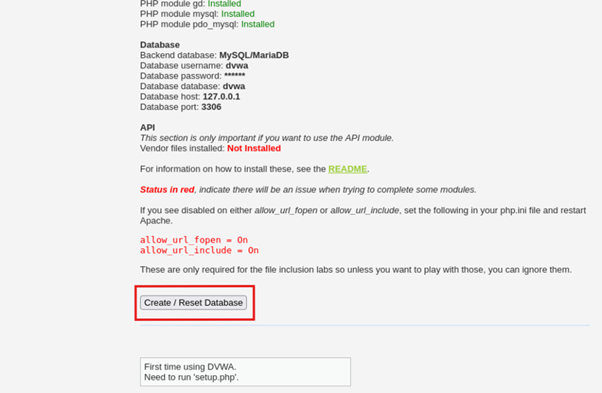
Once logged in, you’ll be greeted with some stats and information. Scroll to the bottom of the page and click the Create / Reset Database to start the process.
You’ll then be sent to the login page again.
Step 4c – DVWA Setup
Before logging back in, we will make two small configuration changes.
We will set the default difficulty to Low, that way we don’t have to change the difficulty every time we want to use DVWA.
Additionally, we can turn off authentication to the application, allowing certain attacks to be carried out easier.
Edit the config file using:
sudo nano /var/www/html/DVWA/config/config.inc.php
You’ll see this:
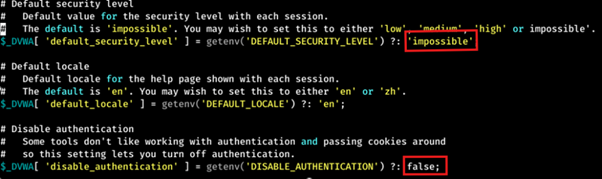
Change “impossible” to “low”, and change “true” to “false” as shown below.
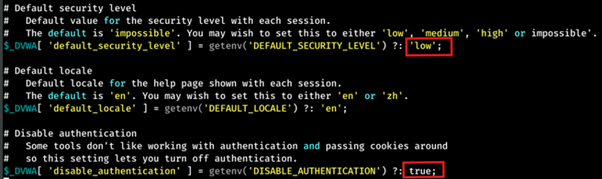
Once the changes have been made, you can then save it.
Step 4d – DVWA Setup
Before using DVWA, we will restart the web application to make sure any recent changes have been applied.
sudo systemctl restart apache2
Step 5 – Final Check
Browsing to localhost/DVWA, you will now see the menu panel without having to log into the application.
Now you’re ready to start safely and ethically start testing!
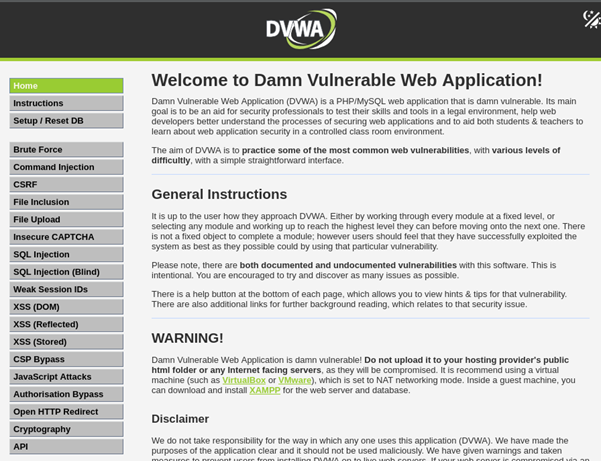
That’s it! You have now successfully installed and configured DWVA to run on your Kali machine. You won’t need to use the IP address to interact with it, you can use localhost, which is an alias for 127.0.0.1 aka the loopback interface. But for simplicity, we suggest you use localhost.
Next Steps
We have a full guide of attacks and tools you can practice on with DVWA. Why not have a read through those and have fun learning some new tools and techniques.
If this guide has been useful, please share it on your socials or link it on your site.
BLOG Categories
- Cyber Essentials (1)
- General (1)
- Internal Infrastructure (2)
Need a Security Assessment?
Our expert team is available to help you plan your next Penetration Test, Cloud Security Audit, or Cyber Essentials Assessment.